
I do apologise for not actually putting up more posts along the way, but some of the WIP bits were very "samey", especially since it was essentially two different units only used. Additionally, I really did the finishing touches in the final week and a half and just didnt get a chance to write up a post!
I have recently started work on the Blood Angel / Grey Knight "division" of my army, much in the same vein as Venerable (it is essentially just heavy armour / tanks) and these will be some of my next posts, with some list thoughts around them. I also want to go through some list building thoughts again with the Deathwing up to 1750 and some new things I may try with these - as well as look at the performance of the units / army as a whole moving forward.
So anyway, here's the WIP, I'll be throwing up a second post over the weekend to finish it off, so here's part one, which is covering my terminators, bikes and also a tutorial on how I did the basing. The following post will have a hefty section on Belial, and also on my objective markers and some of the painting techniques I used in this as well as a bit of "conversion / kit bashing" work.
The Finished Deathwing
Unit One:
Unit Two:
Unit Three:

Unit Four:
I also made a couple of extra weapon options (thank god for magnets) as I noticed I had gone slightly over in my point limit (5 points - I.E I had to replace a chainfist!).
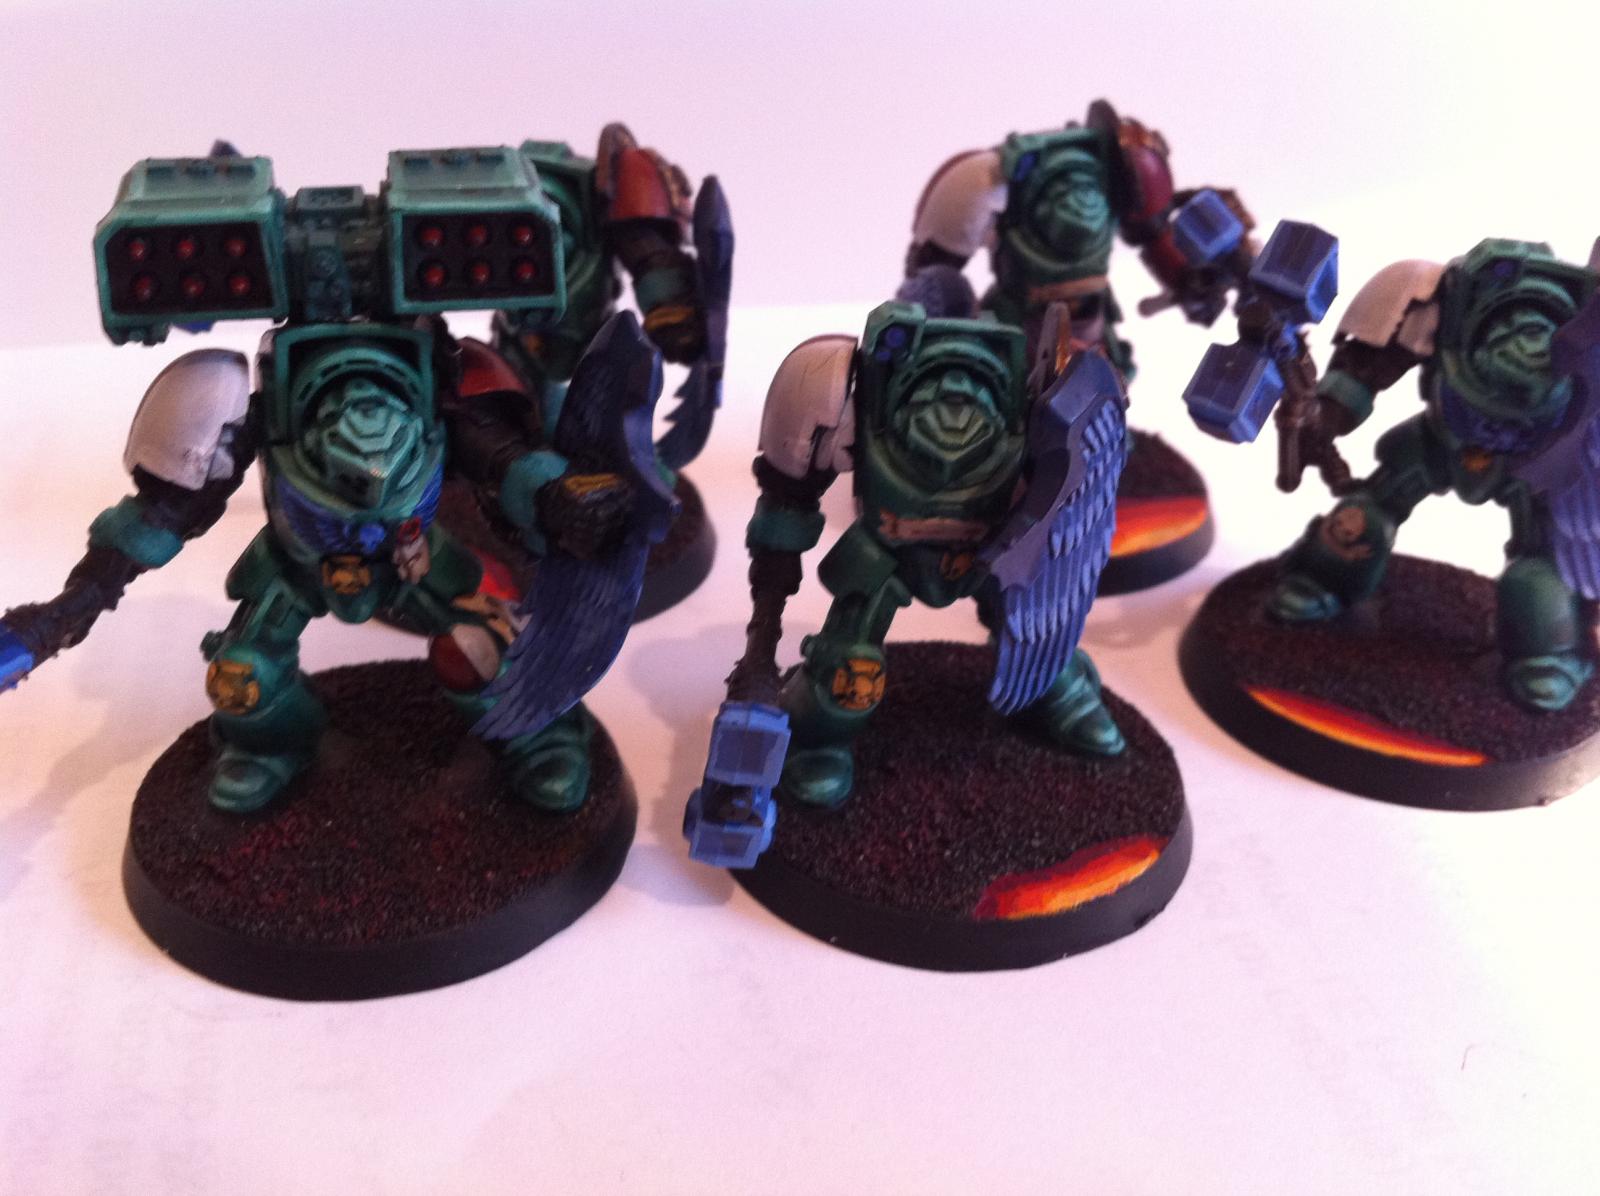
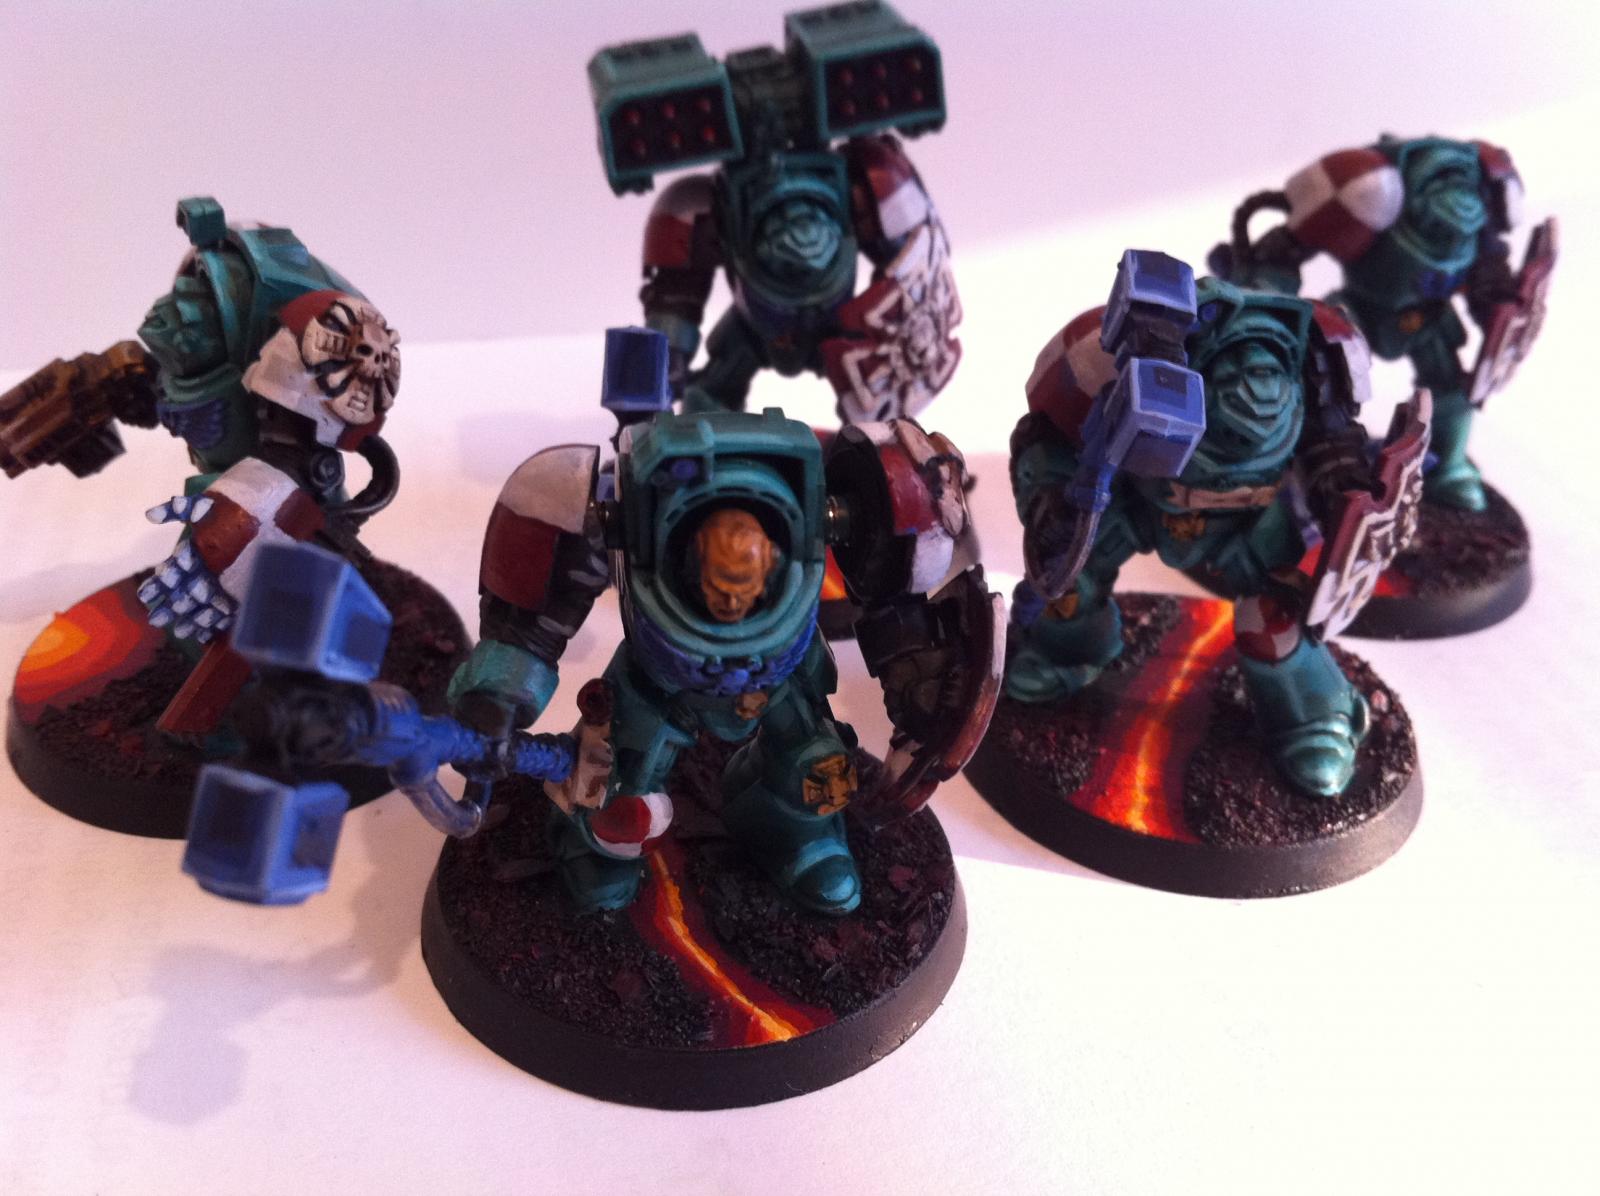
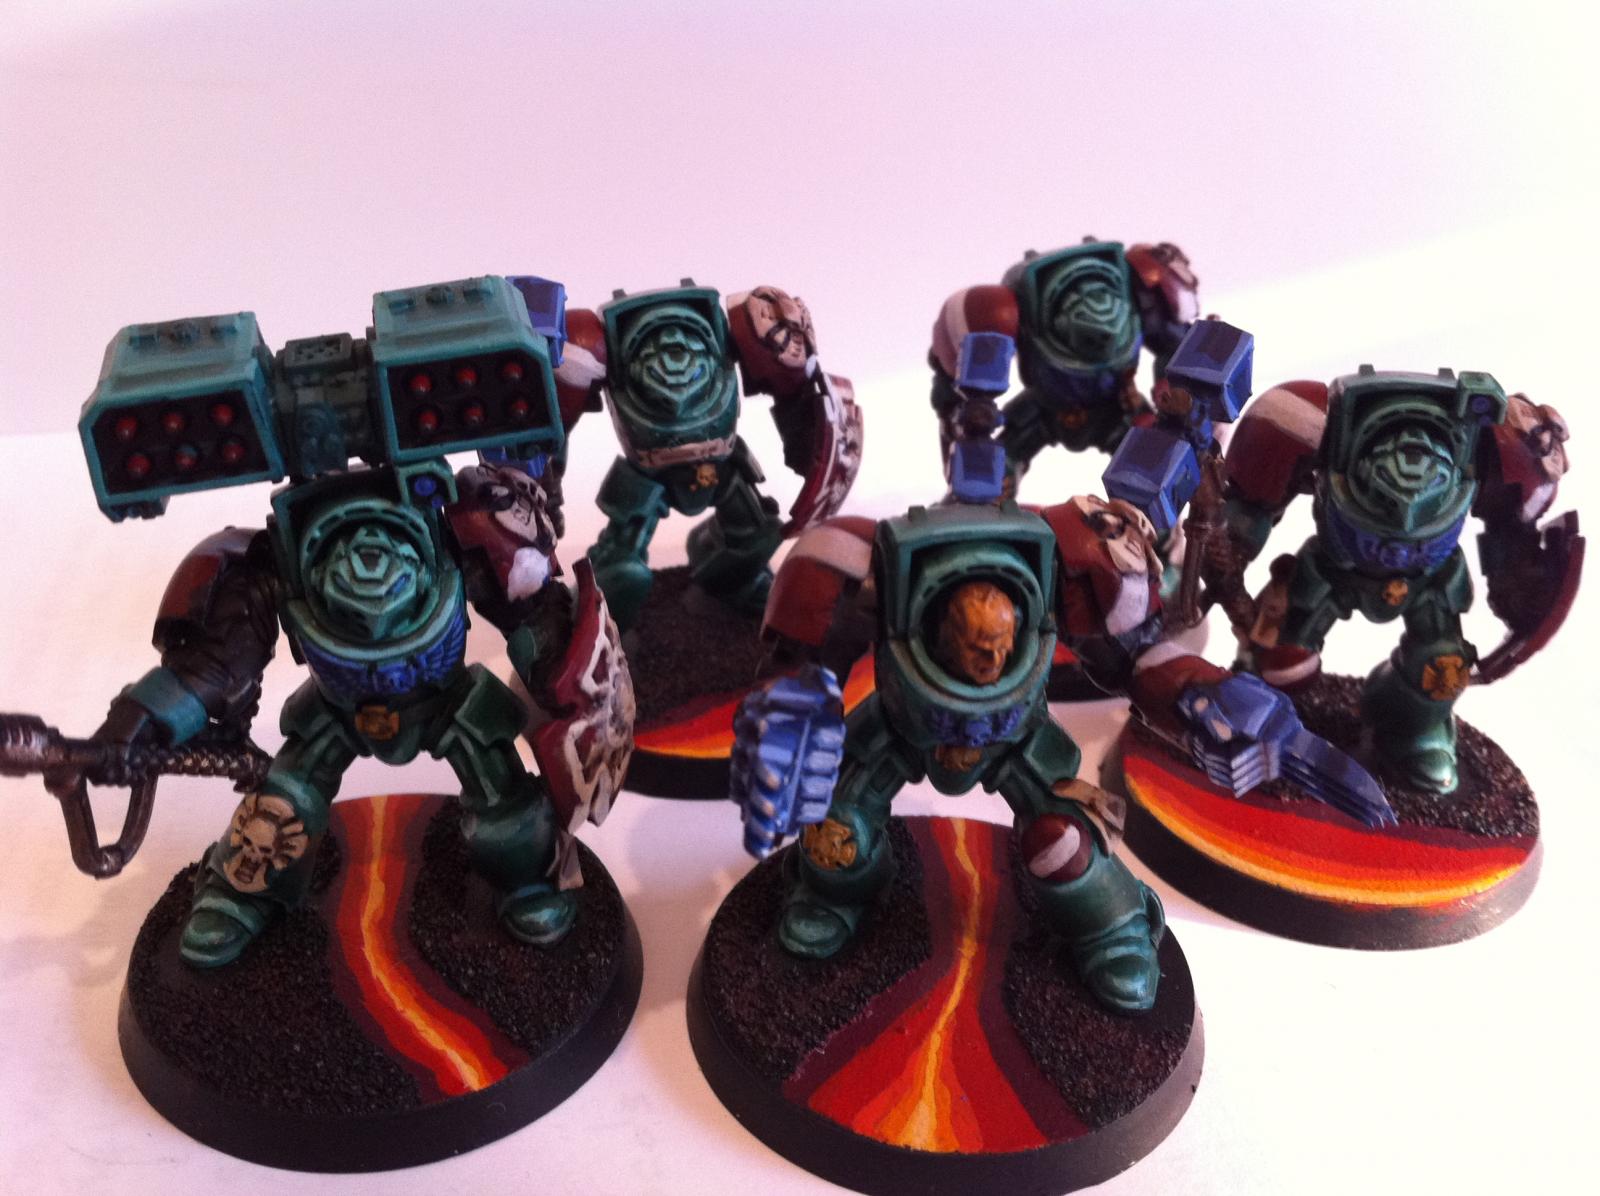
The results on the terminators weren't all that bad. I think I got them to a good table top standard, but what's handy is that they are a pretty decent base and I now plan to add some extra details to the squads, marbling and battle damage between the squads. I will be doing some posts on this in the future. Also I plan to go back and add details to things like the eyes and lights - mini little glow effects.
I will be re-doing the arms. You cant see very clearly, maybe only just, but the shields on the non-command squad are quite bloby/unclean. Additionally the TH arms and the back side of the shield arms were "cheated" using just dry brushing, and i am not really pleased with the results. The TH's might be salvaged via washes and re highlighting, but if not I can just simply re do these and magnetise up another set - maybe not all 20 - but a couple of squads. This was the result of raging out all the arms in a single evening quite tiredly, when I could have spaced it out over a couple of nights. I am probably going to switch to all "Sang Guard" shields as I love the effect on these and they stand out / contrast the models very nicely, the squad marked shields are nice, but I just like that highlighted blue against the green/blue armour.
The Finished Ravenwing:
Unit One:
Unit Two:
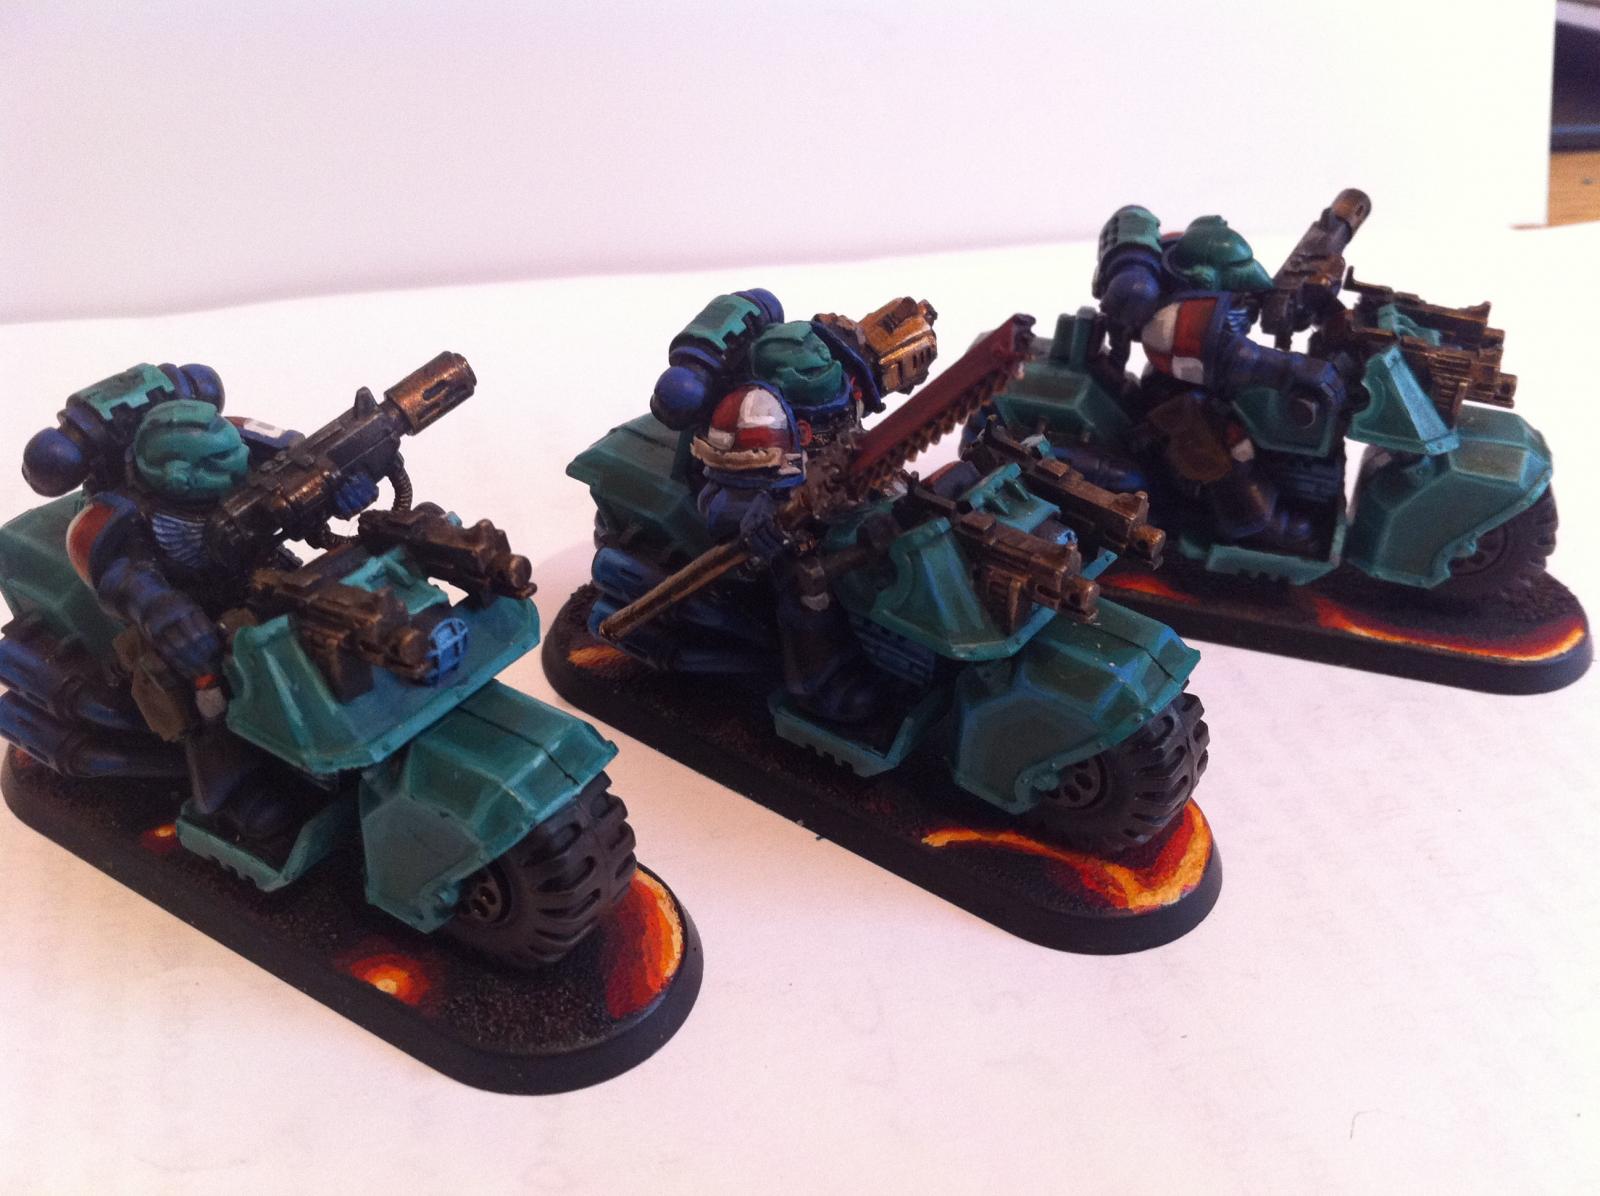
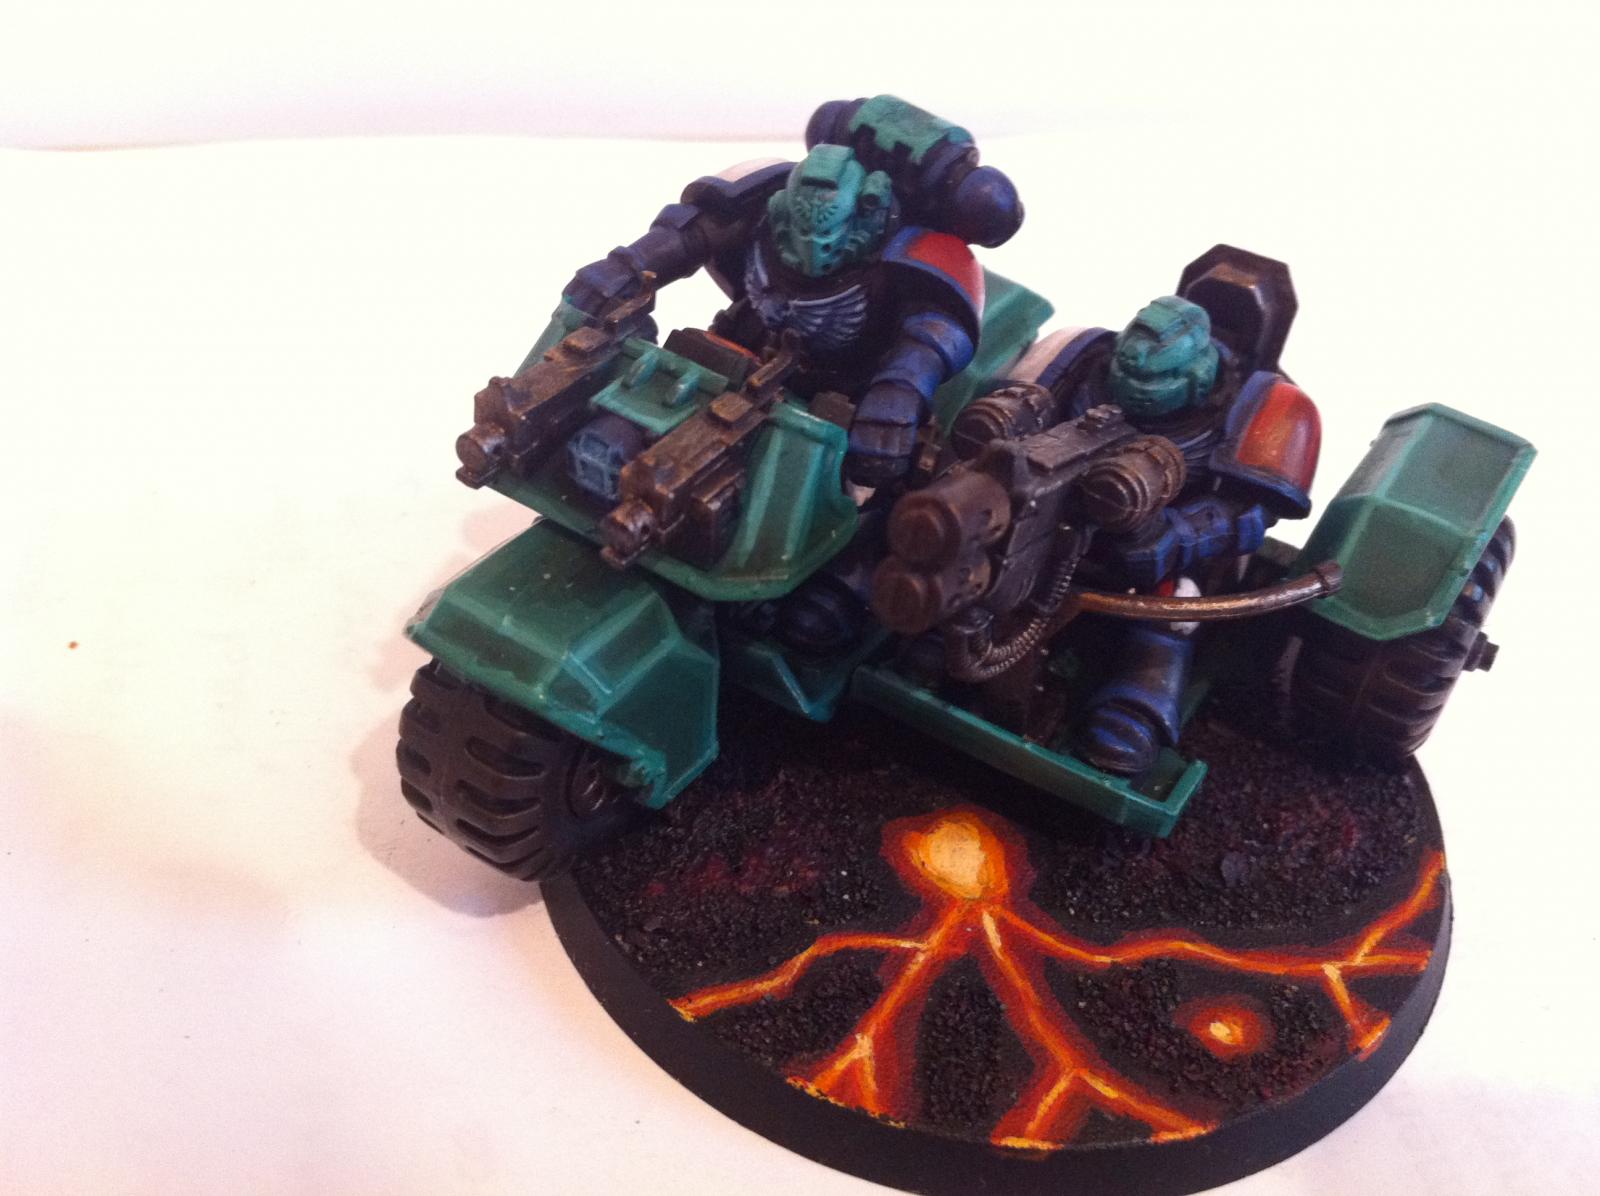
Attack Bike One:
Attack Bike Two:
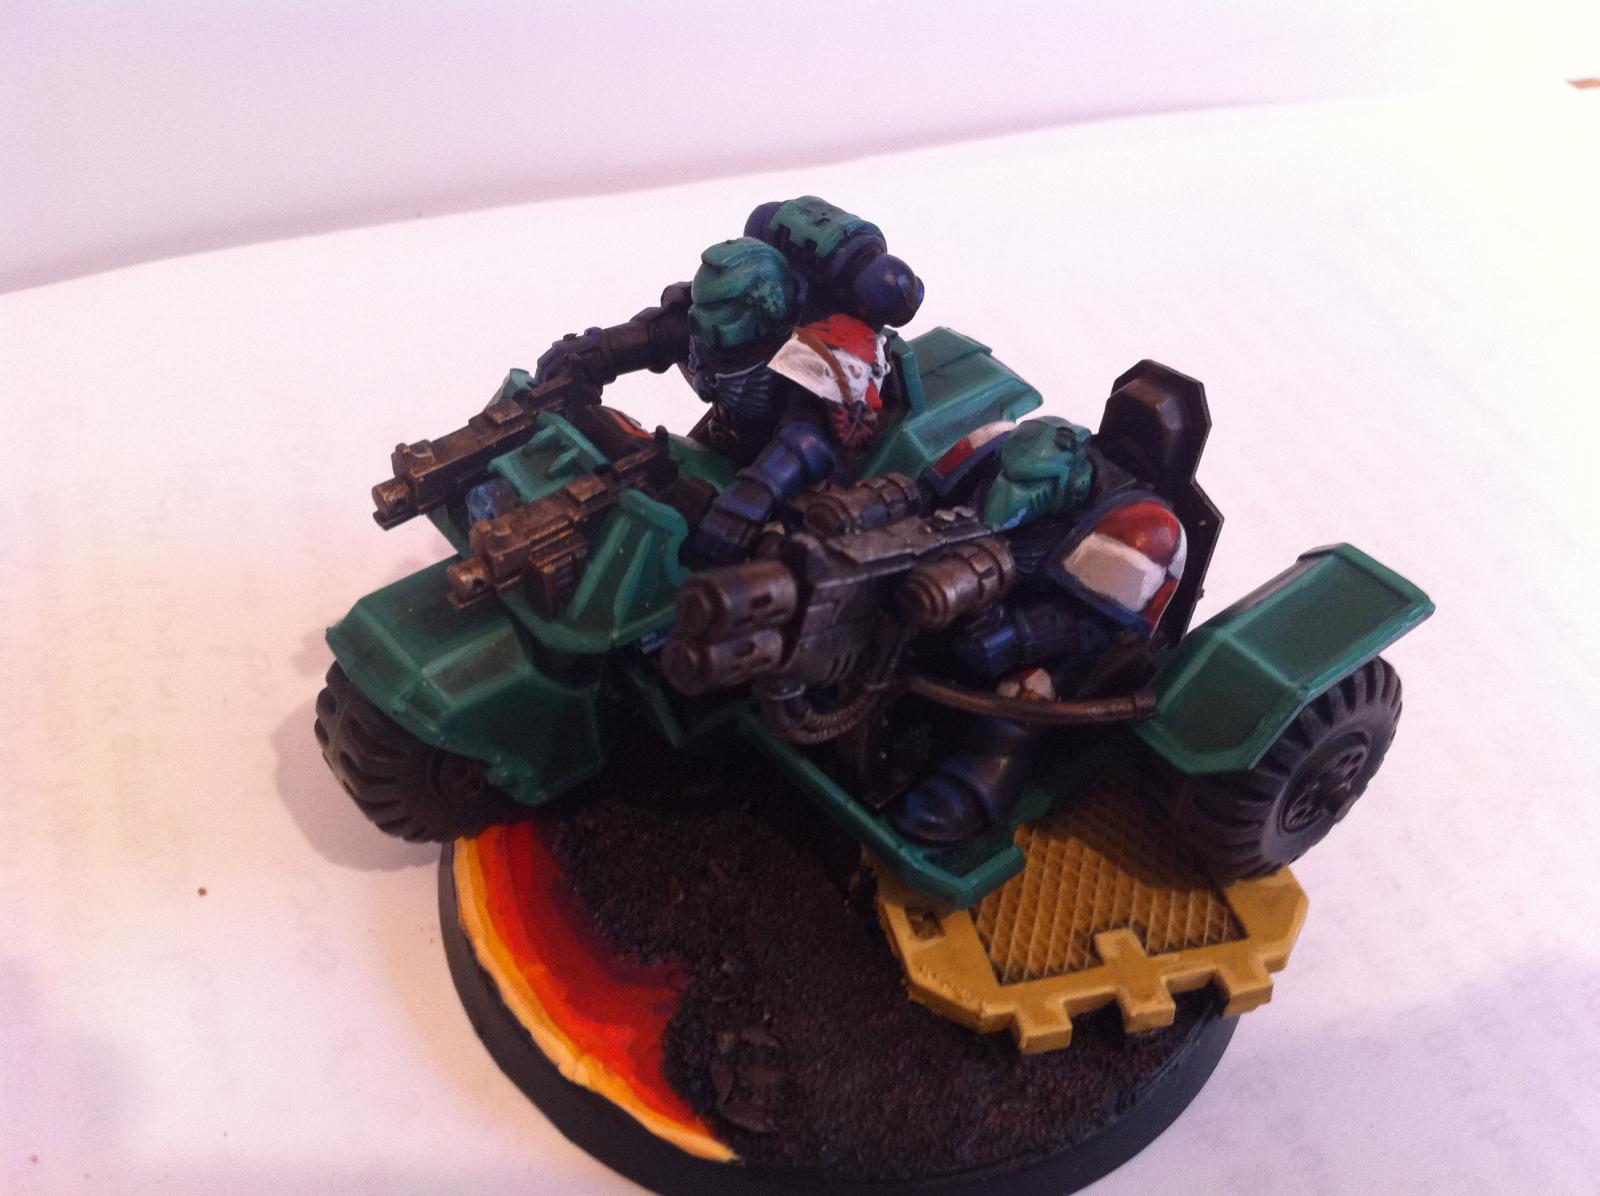
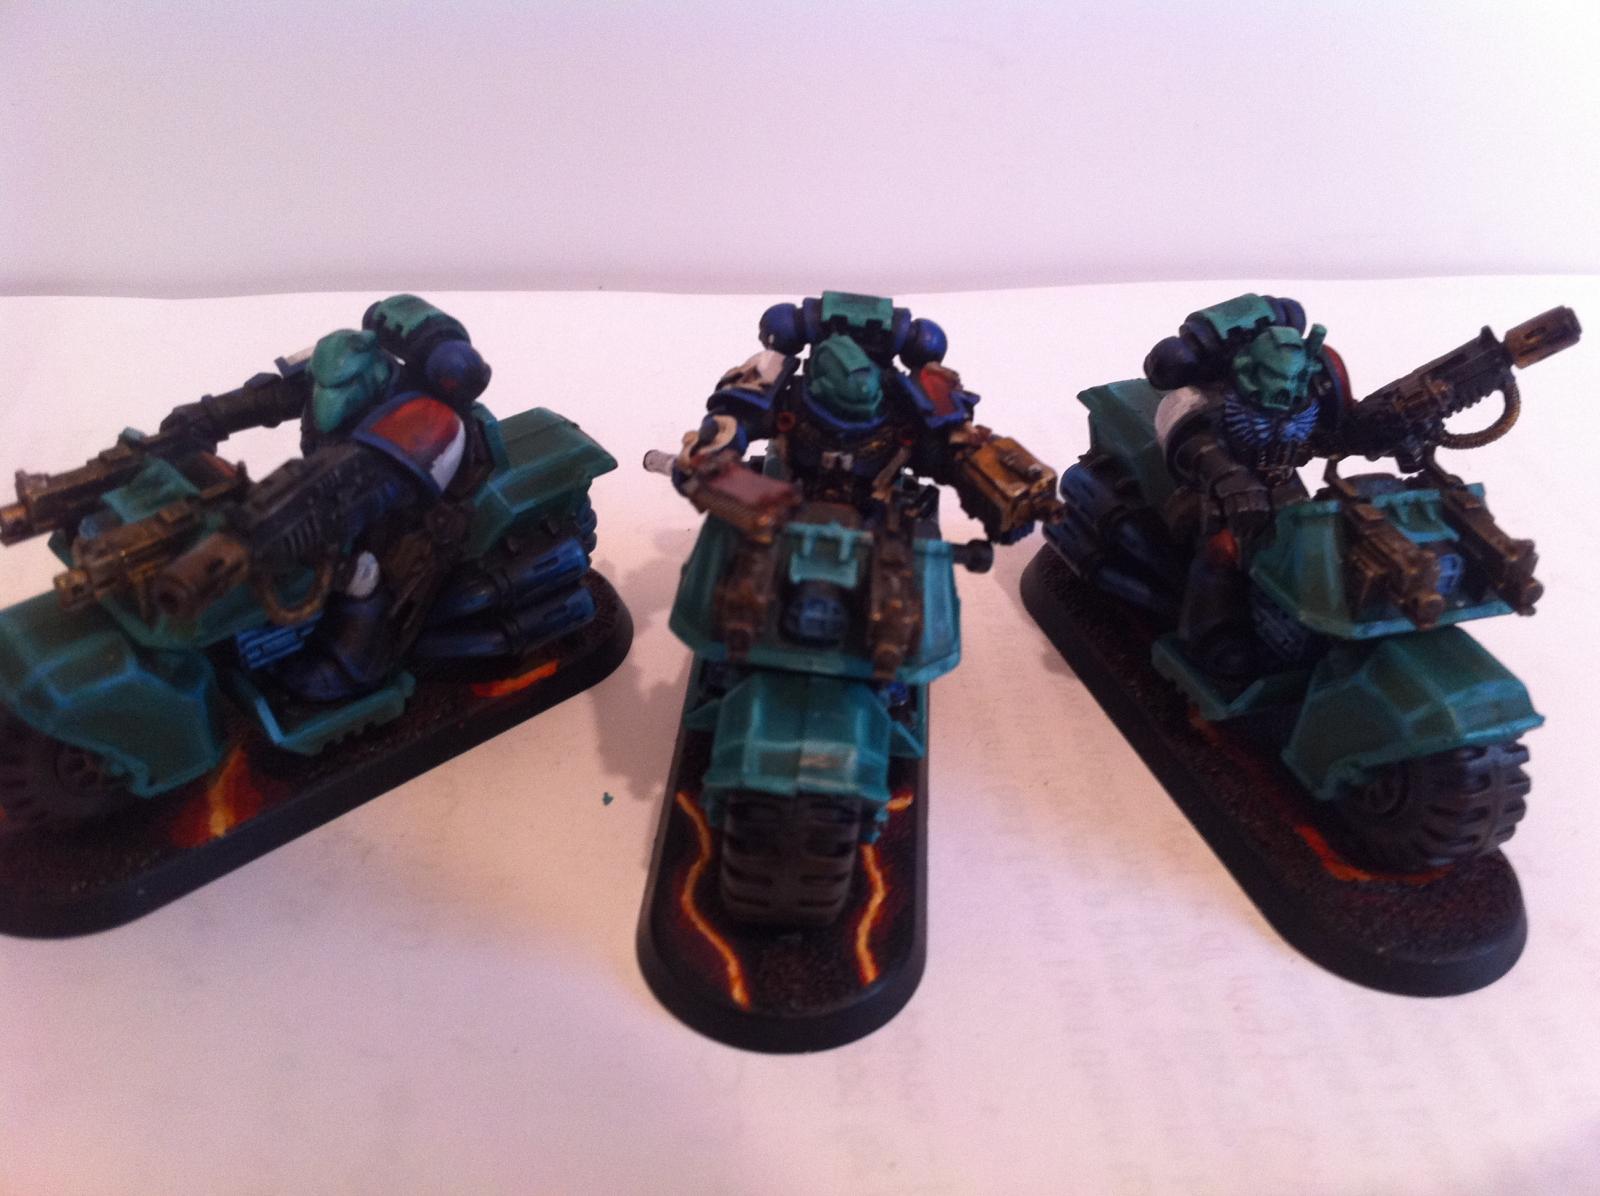
Over all I was quite pleased with these fellas - again speed was involved here so I could have highlighted a lone more clearly given the time. I do plan on eventually making a couple of full bike squads with some options of war-gear, so these might get replaced for the army, but I think as a standard they are again pretty decent - for something that I had to rage all 5 out in a couple of days.
I was pleased with the over all effect, I had some scare moments during the progress of these as I wasn't sure how well the black/blue highlight would work on the model, nor the squad markings, but it tied itself together in the end. This is really where my colour theory lets me down, I can visualise a model, but sometimes I just don't have a clue and don't have that good grounding in colour theory to really know what will and won't work/clash.
Basing Tutorial:
I don't want to become to long a post, but I want to get this up here. I get a good few comments about my bases, even at the "best painted" part of the tournament it was brought up, so I feel its a great way to add some painting points to an army - very easily.
Flocking:
I am not a big fan of flocking - which is why I do paint my bases. I was originally going to do all marble bases, but the tourney stipulated that you needed texture on the bases, and I do actually like the lava bases anyway - plus it actually took me quite a while to get the marbling effect sorted.
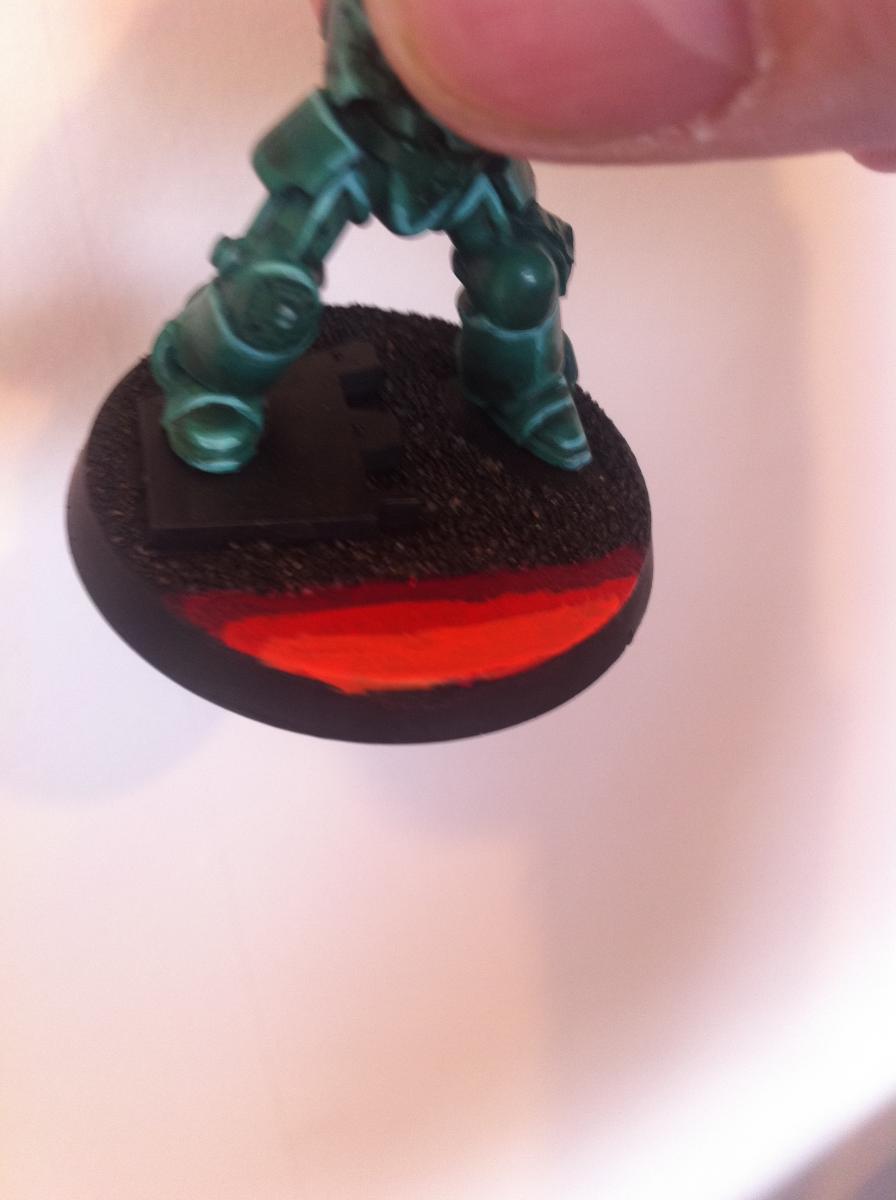
However, I did need to "flock" some of it - standard procedure applied - PVA - sand/small slate mix. Base black, then used the black/red mix to dry brush on, and then red gore at "high points" as a sort of highlight. I just felt the usual grey wouldnt work well with the colours already on the models and bases.
Stage One:
Coat your desired area Red Gore - a tip here is to actually add Chaos Black to the Red gore - something like 4:1 - the chaos black with the RG will provide a slightly better coat / base to work up from, I find it less work to just add this base coat in. Also I use this mix to paint the sand/gravel area (heavy dry brush really).
Stage Two:
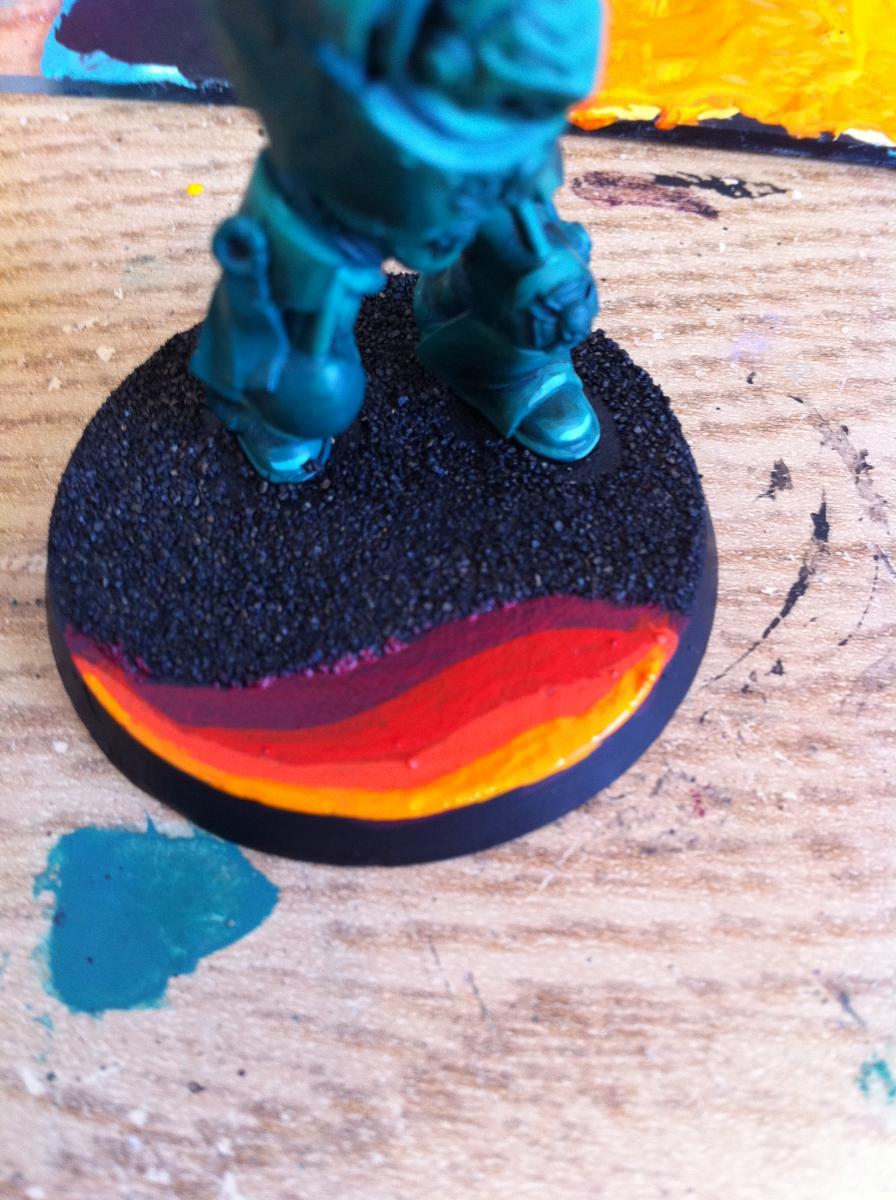
Some people go straight to blood red, and I do sometimes, but generally I just blend up - I add Blood Red to the mix, add a little bit more, then move to stage three - the oranges. When blending I advise working from the edge of the base backwards, you can just "line" it in, as well (in the example I have done this) but working back does create a blend a bit more naturally.
Stage Three:
Like I say above I add Orange to the mix - sometimes I start a new mix, and just add a fraction of red - it doesn't need to be precise, since its "organic". The orange I use is blazing orange, but the foundation paint isn't terrible either. Incidentally you can just add golden/sunburst to the red mix for a similar effect and blend that way.
 |
| So at this stage I've blended up 3 or 4 layers. You can see in the very closest parts to the flock the "darken" red gore, then moving up through the stages up to the orange - you might tell that the orange has a small bit of red in the mix! |
Stage Four
Now to the yellows - I use sunburst typically, but golden etc.. is fine. I again add this to the mix (or start a new mix and add a fraction of the old red/orange one to the yellow). At this stage you do need to be patient. The yellow will pull the orange if not dry, so wait for it all to settle and then add, you can get away with blending the reds and even the oranges while still slightly wet.
Stage Five:
Simply add white now, and highlight upwards - your looking now at more precise lines - around the edges "down the streams" so to speak, this is the lava at its hottest/peak/spitting points. I normally do one blend with white added, then add some more and go back again. However not all my bases do this - I do vary the level of "heat" so to speak.
|
| Not the best example, but you can see that there is two levels of yellow here. Also it is pretty apparent that the yellow is not a pure colour but a mix from the orange - after stage one I rarely work without using some part of the previous stages. Belials base I believe has about 10+ levels of blends on it! |
Bonus Stage Six
Adding pure white to "high points" especially if your using textured lava (spitting etc..), just add pure white to the highest points.
Conclusion
There we have it, fair whack done. Only Belial and my objectives left, which as I say I'll cover at the weekend. my regularly scheduled post will be covering my new project - GK / BA's and some pictures of my tanks in that. I've also decided I'll be doing a modified version of my mechanised BA's with some of this - either a terminator deathstar or a variant of my predator spam. I do need to paint up another terminator squad though for my 1750 Deathwing - I will spend a lot more time on them (only 5 models after all!) - one thing I am after is a big flat shield for this, is any one aware of something like that - I am looking for Sanguinary Guard wing sized - but big, flat and plain as I want to do free hand on the front.
Wicked basing tutorial mate. Will have to try it out and see how it looks...I know it looks very effective on the tabletop..
ReplyDeleteDeathwing and Ravenwing look great too, nice heraldry and still just love that paint scheme.. Get the next 250 finished for Blog Wars!
Definatly - putting a bit of planning into the new squad - will start when I get back from New York next week. This squad wont be magnetised - but actually converted - plan on some interesting bases as well.
ReplyDeleteStill working on the 1750 list - I think I'll keep it simple - stick to what I know, and gives me time to work on the new squad and touch up the older ones.
I'll see how the likes of Blog wars + the june/july tourneys go with this army. I do plan on making a mech army just to "have a break" from all terminators - but I am more tempted to go with that "fun" storm raven/land raider list rather than a serious competitive list, but I'll see how the early part of the summer goes!
What sort of conversion work you thinking of?
ReplyDeleteWell originally I was looking at using space hulk terminators - but that wont fit my scheme, what with the helms and all - and really I dont want to just hack everything off them, kind of defeats the point of using them. I think I'll actually paint them up as Lamenters.
ReplyDeleteWhat I plan to do is use both the GK and Assault Term boxes, and look to do a bit of re-posing if I can, I plan to do a bit of raised basing - so some dynamic posing if at all possible (I have plenty of legs, so can have a couple of cracks at it) and also re-positioning of some arms.
Also I am looking for a nice big flat shield - about the size of a sanguinary guard wing, but just rectangular - I plan to do a freehand motif for the command squad for the storm shields.
Plan is essentially to touch up the rest of the army - spend a few hours over a couple of weekends on it, spend a bit more time on Belial - around his lightning claw - and have this focal point of a command squad.
I was checking out the terminators - a bit of a touch up and they are actually golden - battle damage / marbling will go a LONG way on them after the arms are re-done.
I want to improve on my standing at best painted at Brighton Warlords in August ... might help if the SoS boys actually vote for me this time though LOL.
If people have pictures of really cool terminator conversions - bosh them over my way! Advice/tips/suggestions are extremely welcome.