
Welcome ladies and gentlemen, to the penultimate instalment of this guide to the creation of my Vendetta gunships. Today's post will again be picture heavy, and fairly extensive, because it deals with the creation of the rotors. These are entirely fabricated from plasticard and as such require a more detailed explanation.
Now, the design of these rotors owes much to another individual. This guy is one of the greatest scratch builders I have yet discovered on the interweb. His name is Klaus and he builds, sculpts and paints to an incredible standard. In fact, his skill is matched only by his imagination. I believe he has a few blogs, but the one I follow is called DEI GRECI, and can be found here. My inspiration for these rotors comes from his own VTOL gunship, the Charon, which can be found here. That link is to the completed diorama, if you search a little you will find his own rotor construction post.
Anyway, without further ado, here is how i did it.


For various reasons i dont have a circle cutter, so i just cut my circles out by hand. I used the lid of a spray can and a 40mm base for the large and small circles respectively. They were then cut out very painstakingly with a knife and filed down for smoothness. As you will see later, the circles are not perfect, but its not noticeable on the final product so sod it :)
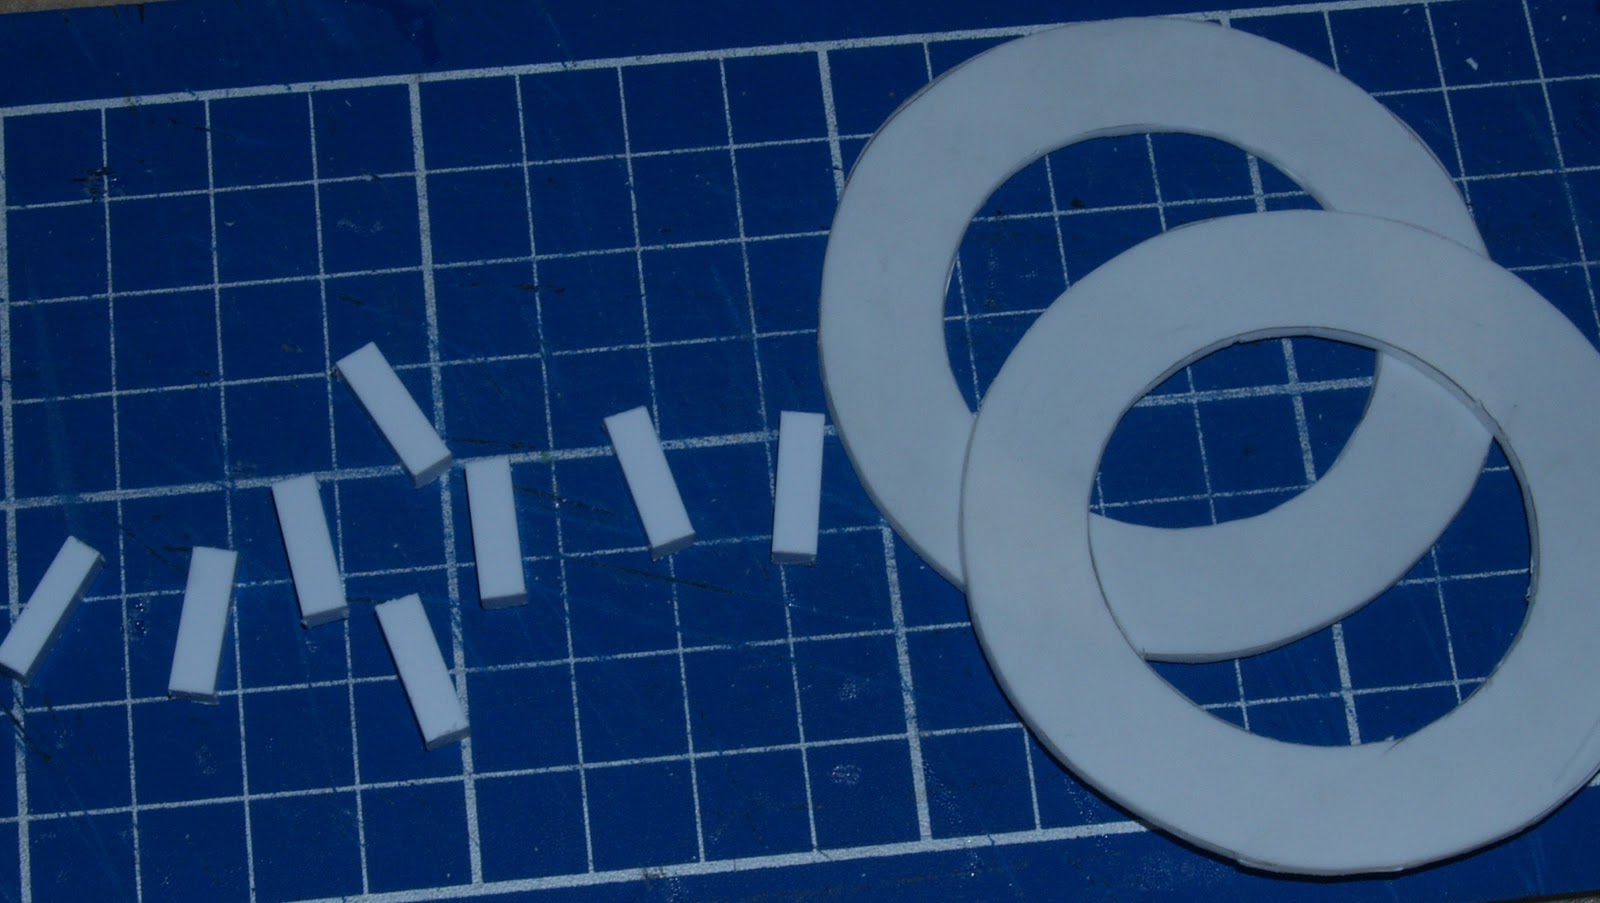
To join the top and bottom of each rotor i used some rectangular plasticard rod cut to regular lengths (in my case, 14mm).


Now for the rotor blades. I knew from the start that i had to have these loose so that they could spin when blown on. Just because its cool :)
This did made it a lot harder to build though...

I began by cutting 9 sections of plasticard for the rotors, and a section of tube to attach them to. I used a piece of Basilisk barrel because I didn't have any tubes at the time, and it worked just fine.

So that they would stick on at the correct angle I filed one end of each rotor blade with a curved diamond file, ensuring a similar angle on each.


The first three blades in place.


And the other 6. It was very difficult to get them all to a similar angle, but it didn't matter much, because they would be mounted within a fully enclosed cowl. As long as they didn't hit the top or bottom then it was OK.

With a little wriggling, the blades were placed inside the cowling. Someone less impatient than me would do the sensible thing and glue the top on after the rotors were inside ;)


I then cut the pieces needed for the next stage. Again, I didn't have any rod, so I used spare sections of flying base instead. Below are pictures of where the bits above go when glued down. This bit is stupidly fiddly, and involves constantly blowing on the rotors to make sure they don't accidentally get glued in place while the rest dries. Fun stuff.


It is especially important here to ensure the two bits which attach the rotors are level at the point where they will also join the hull. If they are not, the rotor will sit at an angle, and look really stupid.


I then used 0.25mm plasticard strips to fill in the gaps around the outside.


Using the technique I discussed on my hydras, I magnetised two pieces of plasticard so that they would fit snugly onto the hull, and glued them to the rotors.

This is what they looked like at the basic level, before any gaps were filled in and details added.


And here they are attached to the hull.
Well, that's it for today. In next weeks post, the final in this series, I'll talk you through the construction of the interior.
Weird:
ReplyDeleteThe pictures make it look dead simple.
Your explanation makes it sound impossible.
The rotors are interesting because on the model they look like they fill that space between the top and bottom, where as they are actually quite small pieces - surprised me when I saw that side on shot.
V.good though Andy - what would you say the time scale is to build one of these start to finish (i.e table/craft time)?
(Oh and where is the shop you got all the plasticard from? I found one in Waterloo that sells all kinds of models and paints but you said there was one near Tower Hill/Gateway?)
just look up 4D models :)
ReplyDeletethat probably says more for the quality of my explaination than the difficulty of the build mate! honestly its not that hard, the challenging part is the measurements. for this bit they really have to be spot on.
if i had to build and paint another one of these now (which i may do at some point soon, just so i can fill my fast attack slots) it would take me about a week of modelling every day. in hours, its hard to say, but if i had to guess i'd say around 36, if not more. its just so fiddly, and some of the bits which look simple are very time consuming. additionally, i dont have all the proper tools, and often have to just make do with what i have even if it takes longer.
Ahh fair enough lol.
ReplyDeleteYour explanation is good, I think with stuff like this is the key is thinking ahead (measure twice, cut once philosophy) and patience. If your not willing put in the time to get your "super awesome custom model" dont bother. I think this is what scares me/holds me back. I want a really "unique" army - but I am worried that given the ammount of time I can put into it in 1 sitting I'll make myself fed up - which is why I try to put a bit more effort into the painting side - which kind of has to be done .. (not that you'd think that seeing all my grey models lol)
awesome post. Great guide and when the final bit hits, this will be an incredible resource for any gamer...
ReplyDeletefunny, I've followed dei greci for a while, but never noticed the tiger taxi...lol...really quite similar! It's a great bit of inspiration...
oh i get fed up, frequently. its why i cut so many corners. even doing that, i have to build this type of thing over a lot of sittings. it will usually take a number of hours over a number of weeks. that way, the ideas grow and ghange as well, and you usually end up with something you can be very happy with.
ReplyDeletefound an awesome shop today whilst out and about with a school trip...hobby craft...picked up all sorts of stuff, including tamiya weathering master set...hoping to get all tanks weathered by next weekend...tried one out tonight and half finished it, looks wicked.
ReplyDeleteHow are the Hydras etc coming? Going to get it all finished!?
I hope you were some offical part of that school trip ven and not just *following* the local kids ...
ReplyDelete^ lol
ReplyDeletehobby craft is pretty good for a chain, yeah.
as for my stuff, it should all be finished. i am painting in most of my free seconds. all my infantry (ST's, weapons teams) etc is finished, the 2nd robot is done, and looks sweet. the 3 (am actually doing all 4 now) hydras are almost there and just require finishing touches. this leaves the Vendetta... that thing will take me the better part of the next week, so yeah. on track. just.
how about you?
@Bully....yeah man, wasn't just stalking!
ReplyDelete@Atreides, will get there...picked up more primer so I can do dozer blades and newly converted flamer turrets, then just got the weathering to do on tanks, about 14 RAS Marines to finish off...
oh and then another vindicator...when it arrives in the post... but have evenings and this weekend mainly free so all good I think...
Really nice!
ReplyDeleteAs mentioned, your conversion looks nice and sleek.
I'm glad my design proved successfull and was so nicely intergrated into yours :)
Cheers
Klaus